
This information is merely meant to be educational and not instructional. Seek out qualified instruction!

Welcome to the final part of our visitors guide for canyoneering in Washington State.
In this post, we will focus on the essential gear to bring in your backpack. This is perhaps the most challenging installment because the bag is a mixture of personal and group gear. Like so many things in life, what you should bring into a Washington State canyon is context dependent.
Our recommendations are based on an assumption that you are visiting an already established and equipped canyon.
GROUP Tactics:
Before you enter the canyon you and your group need to decide how many bags to take, who is taking the bags, and how gear will be divided amongst the bags.
Canyon progress techniques are different in swiftwater canyons. Seek out training in bag management before attempting swiftwater canyons. Without knowledge of these new and different category of hazards, and ways to avoid or mitigate them, your bag can become a dangerous hazard.
Your backpack is not a reliable flotation device. It needs to float, but it is not meant to keep you afloat!
Types of canyon bags:
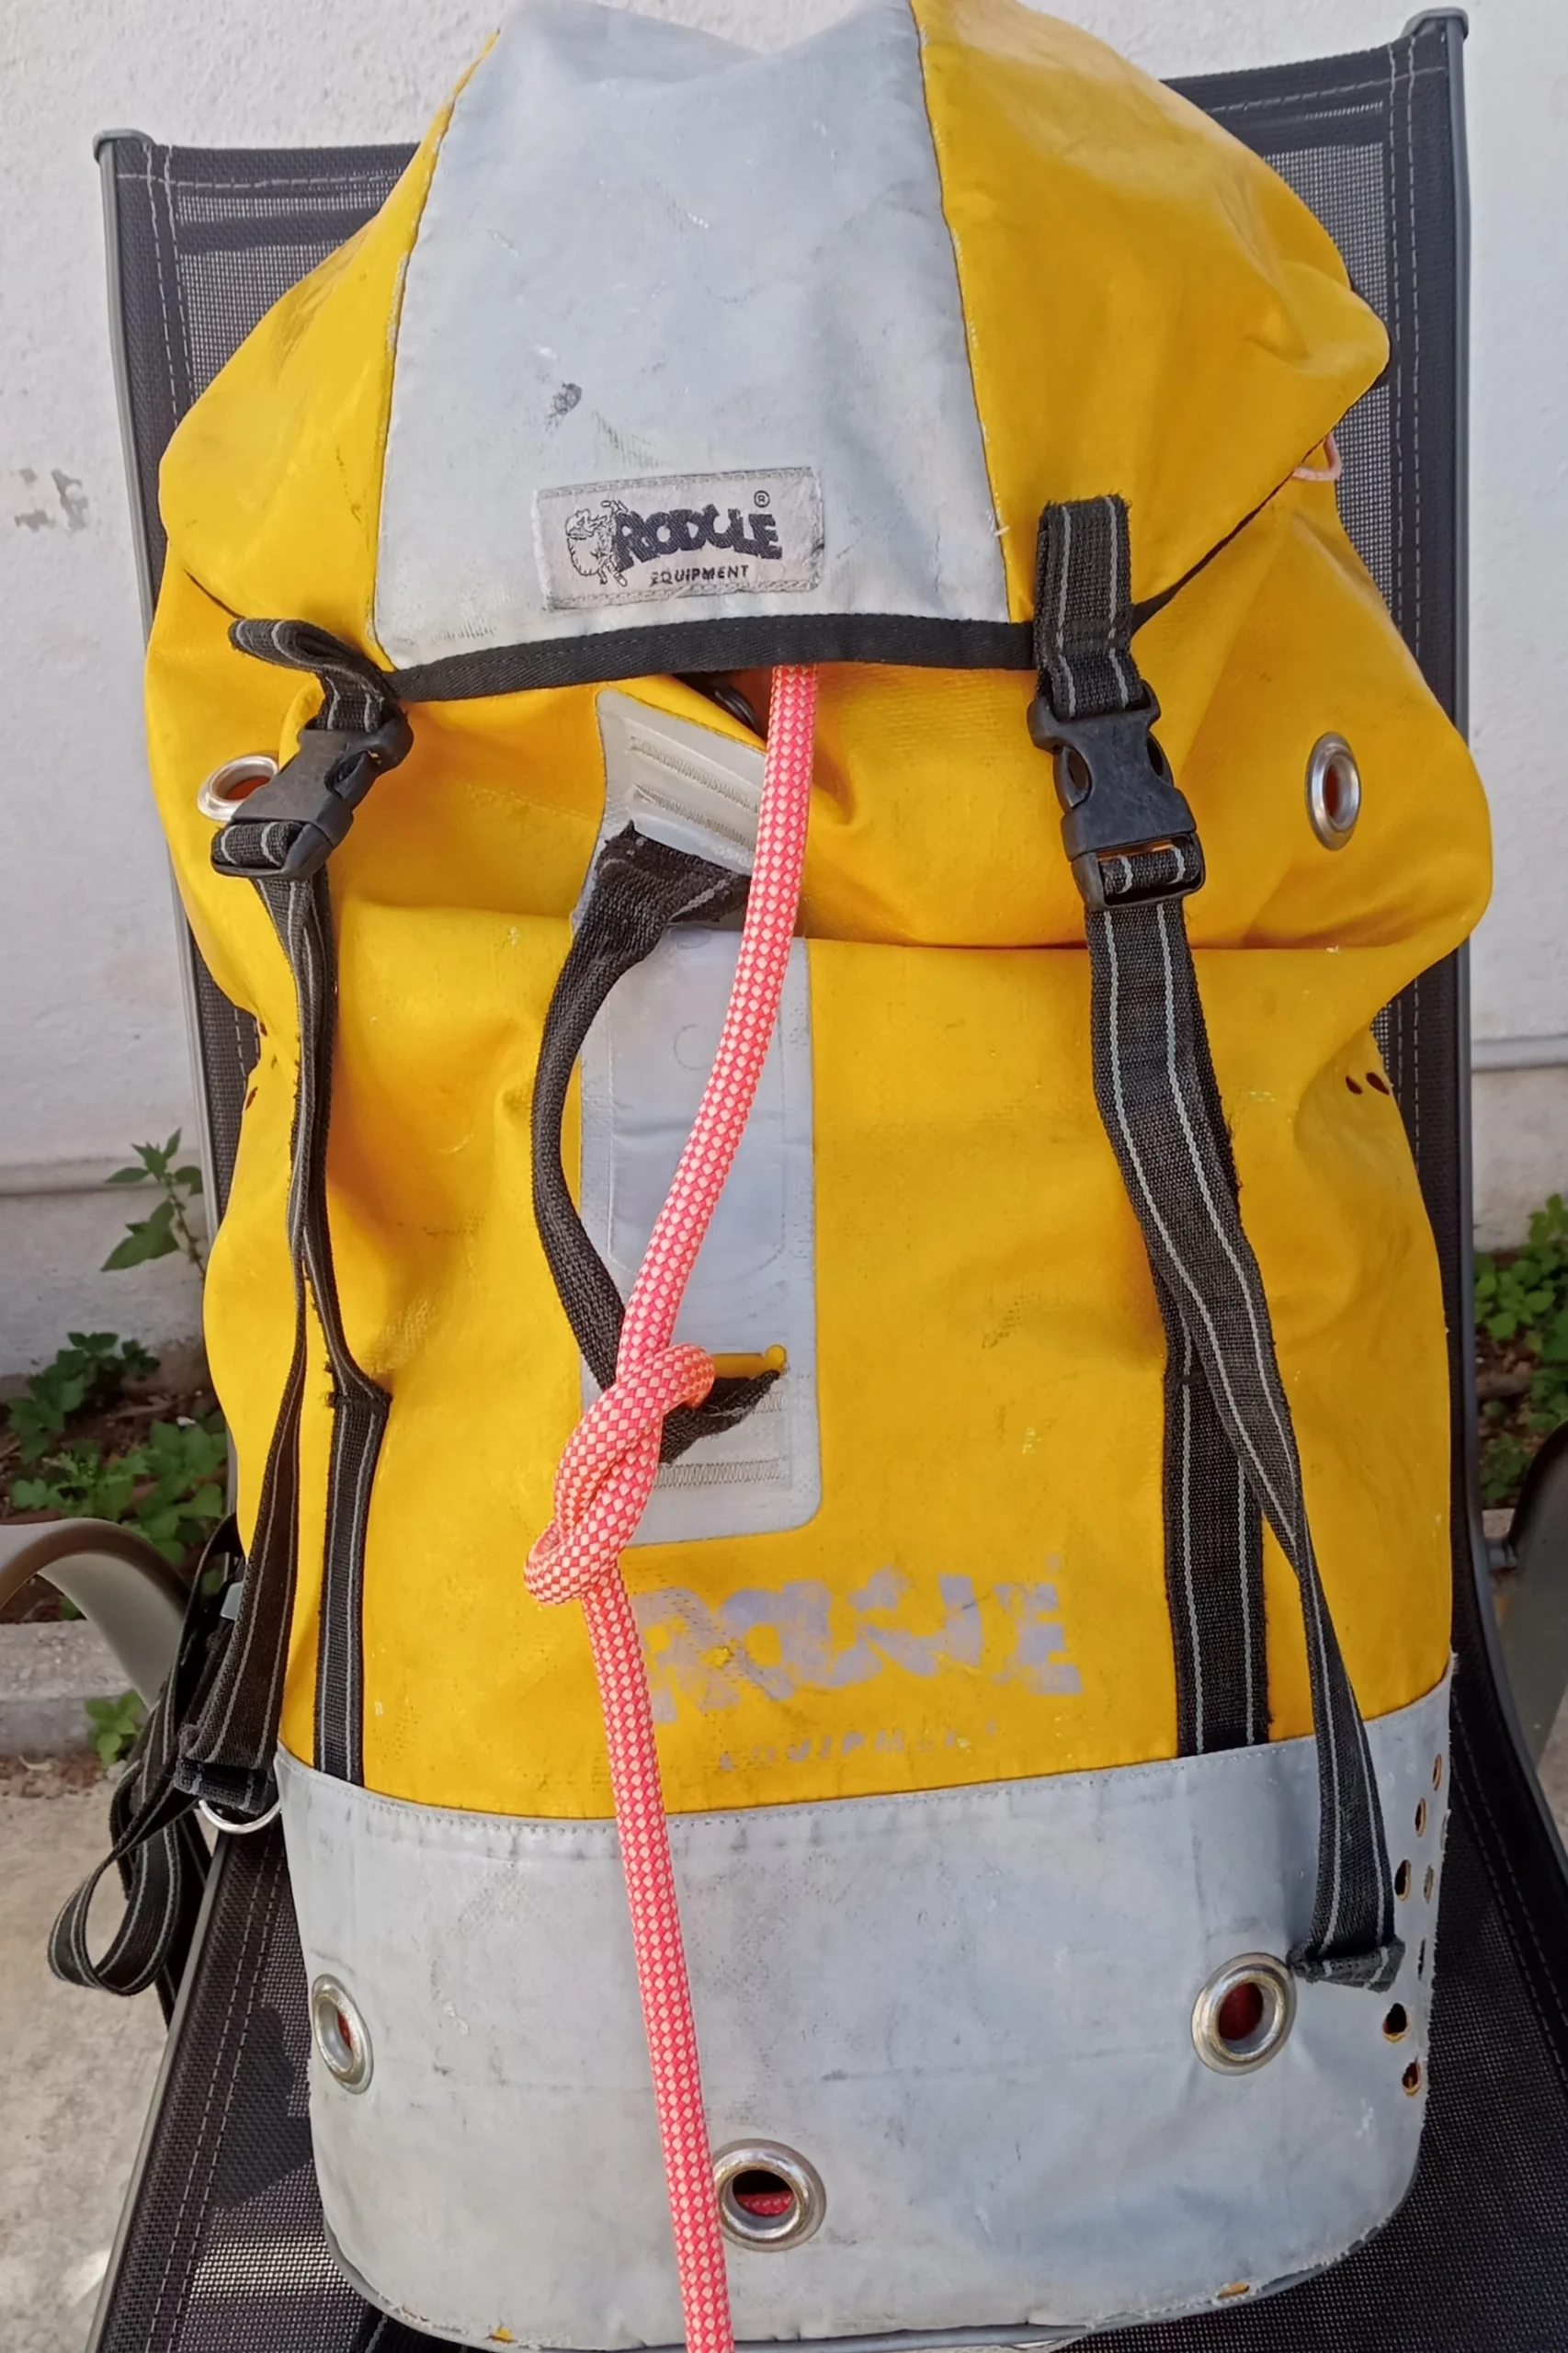
Canyon Backpack:
As detailed in part 2 of our Visitors Guide, there are several considerations to take into account when choosing your bag. Go there to see the Wild Sky recommendations.
Rope Bags:
Many Canyoneers like to keep their ropes in a special rope bag that they attach to their bag or have a team member carry.
There are several options for rope bags that are Made in the USA!
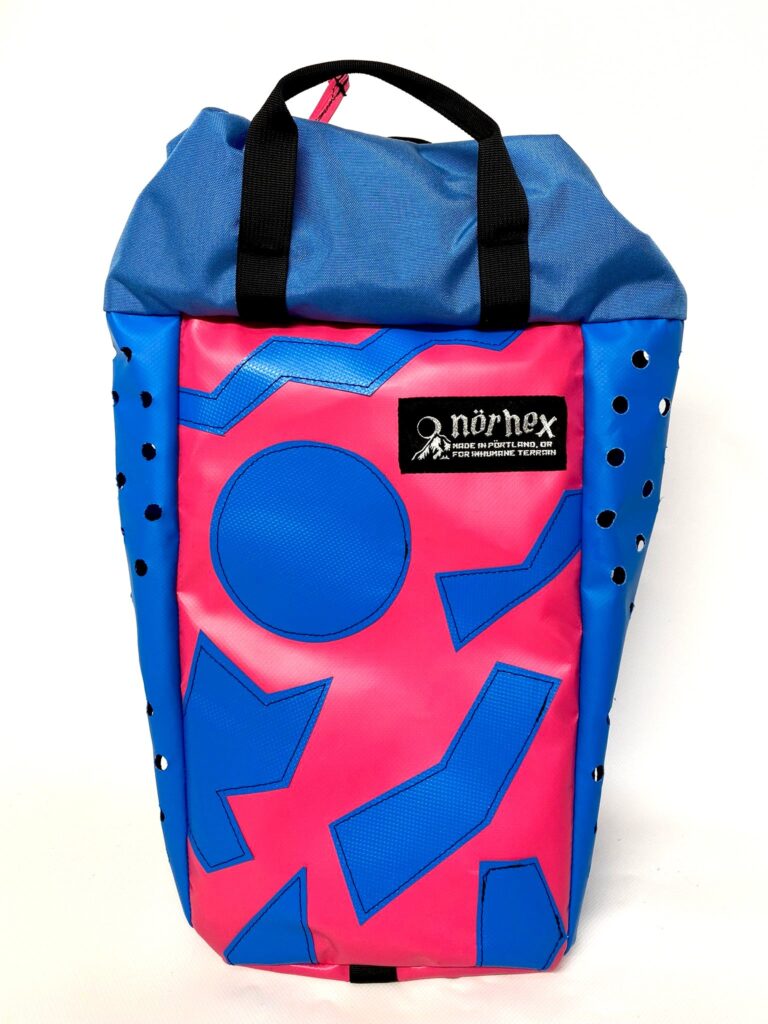
The NORHEX Double-sided rope bag is a PNW favorite. It features a durable PVC construction, double sided openings which all you to access both ends of the rope, great drainage, and stylish designs! All for the most affordable price on the market.
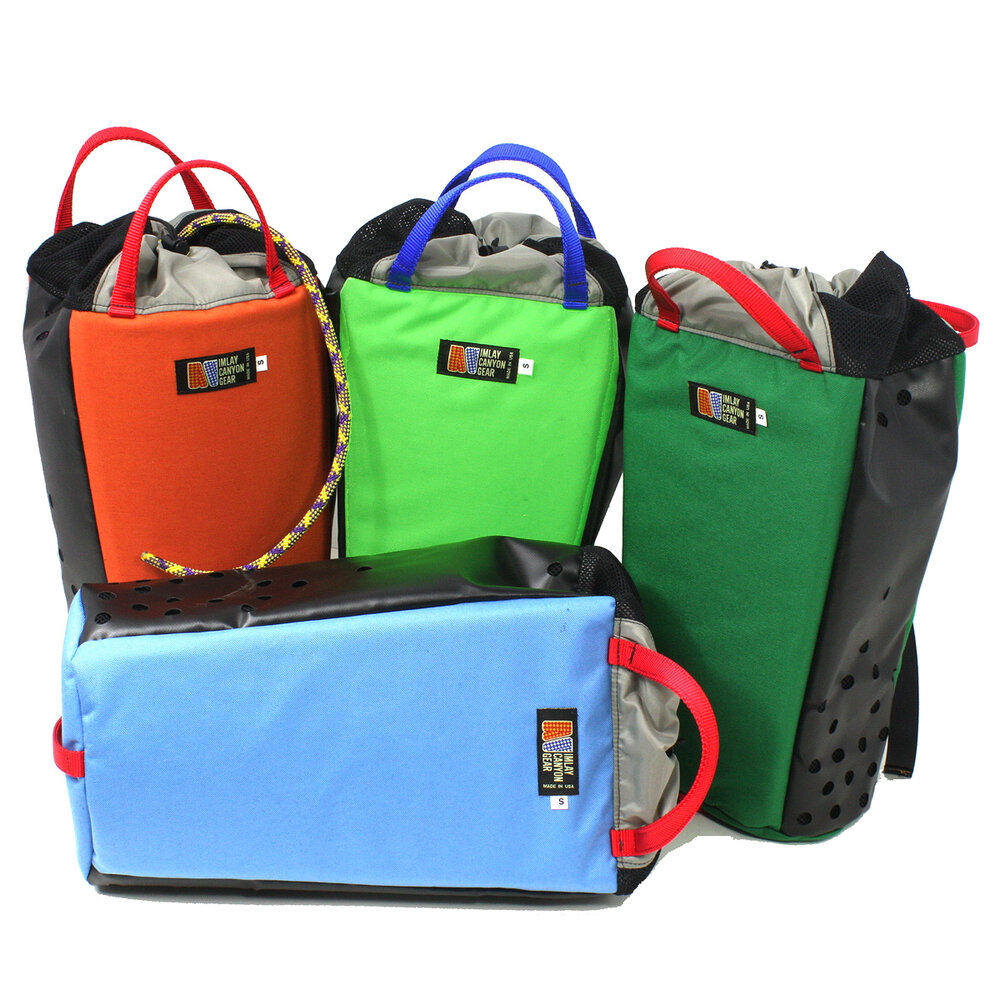
The IMLAY Canyon Gear Rope Silo is another great rope bag. It is made in America and features durable high quality construction. It has foam padded front panels and nylon protected side panels. The Imlay Rope Silo excels because of its exceptional drainage.
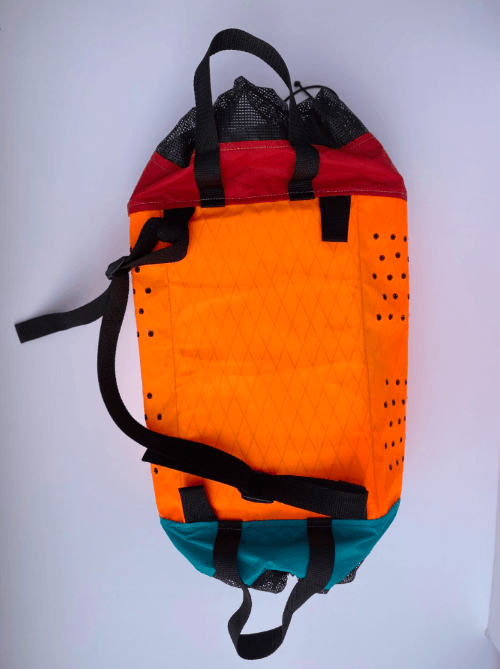
Gear Perspective: Double End Rope Bag is a unique rope bag because it is made out of 100% recycled material. It is also a double ended rope bag, so you can access both sides of the rope. Like the other bags on the list it is notable for its great drainage and durable construction.
Where Should You Store Your Rope?
Most PNW based canyoneers prefer to use a rope bag to store their rope.
It is also acceptable to store your rope in your canyoning bag.
Which way is correct?
It depends. This is an issue of tactics, and tactics need to balance the demands of the canyon terrain and the needs and skills of each group member.
Putting the rope in the rope bag allows the team to share the rope without having to share bags. This is necessary when all members of the group are expected to participate in anchor management.
Putting the rope in the canyon bag is great when all team members have a similar bag setup, so bags can be interchanged. This method shines in a guiding situation where a guide team is responsible for all rope management.
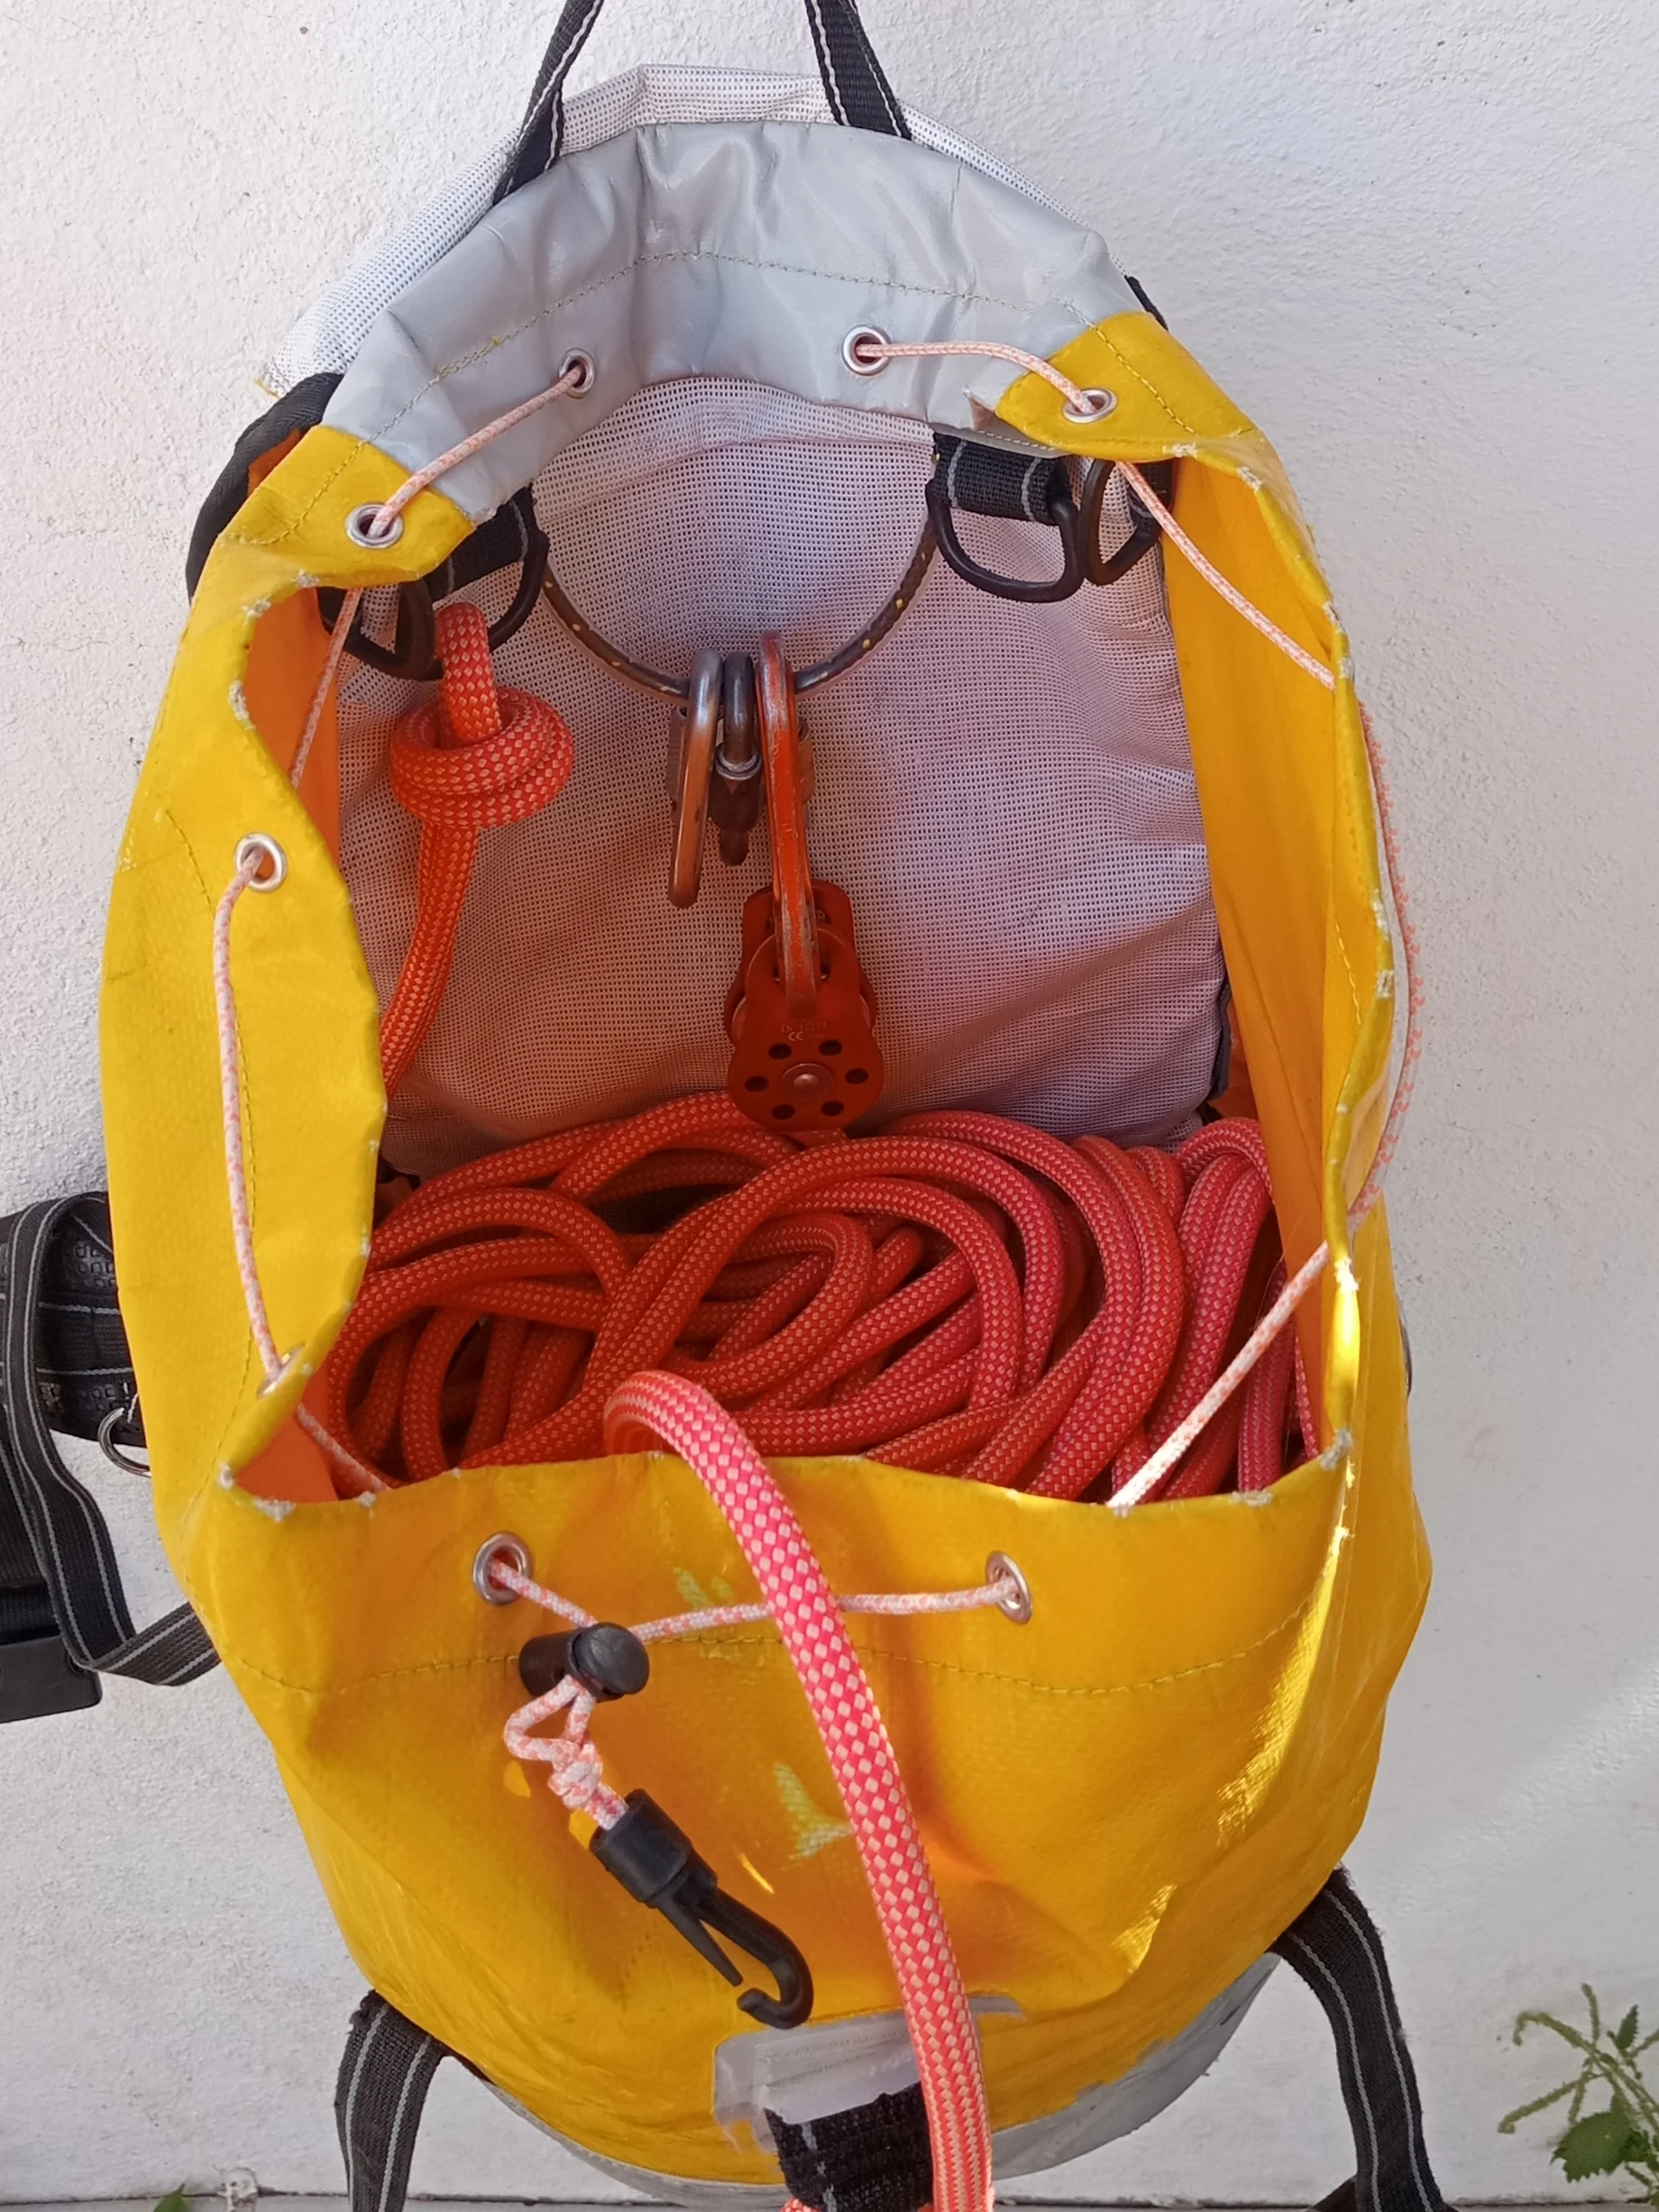
CANYON BAG ORGANIZATION!
Theory: There are 2 different categories of organization to your average canyon bag.
1.) The first category is storage. Rarely used but important things are stored here.
2.) The second category is working space. You store things here that you will use frequently during every canyon descent.
Top to Bottom Bag Shakedown!
Your Bag’s Brain Is Storage Space! This is where you store things that you will use infrequently but want to have quick access to when you need it.
Pro-tip: Store spare webbing inside of a dry bag. Nylon absorbs water and gets heavier when wet.
Brain Packing List: SAM Splint, Extra 120cm sling or PAS, Dry Bag filled with nylon webbing, mallion, and multitool.
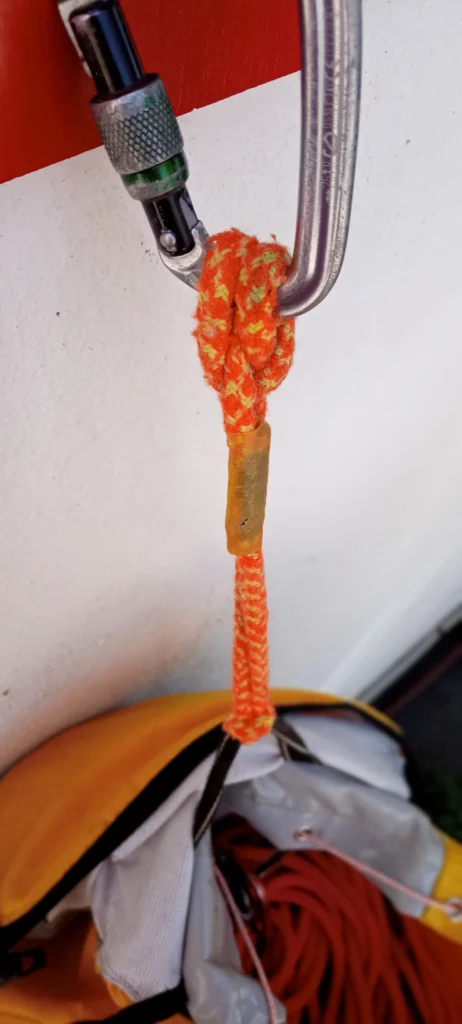
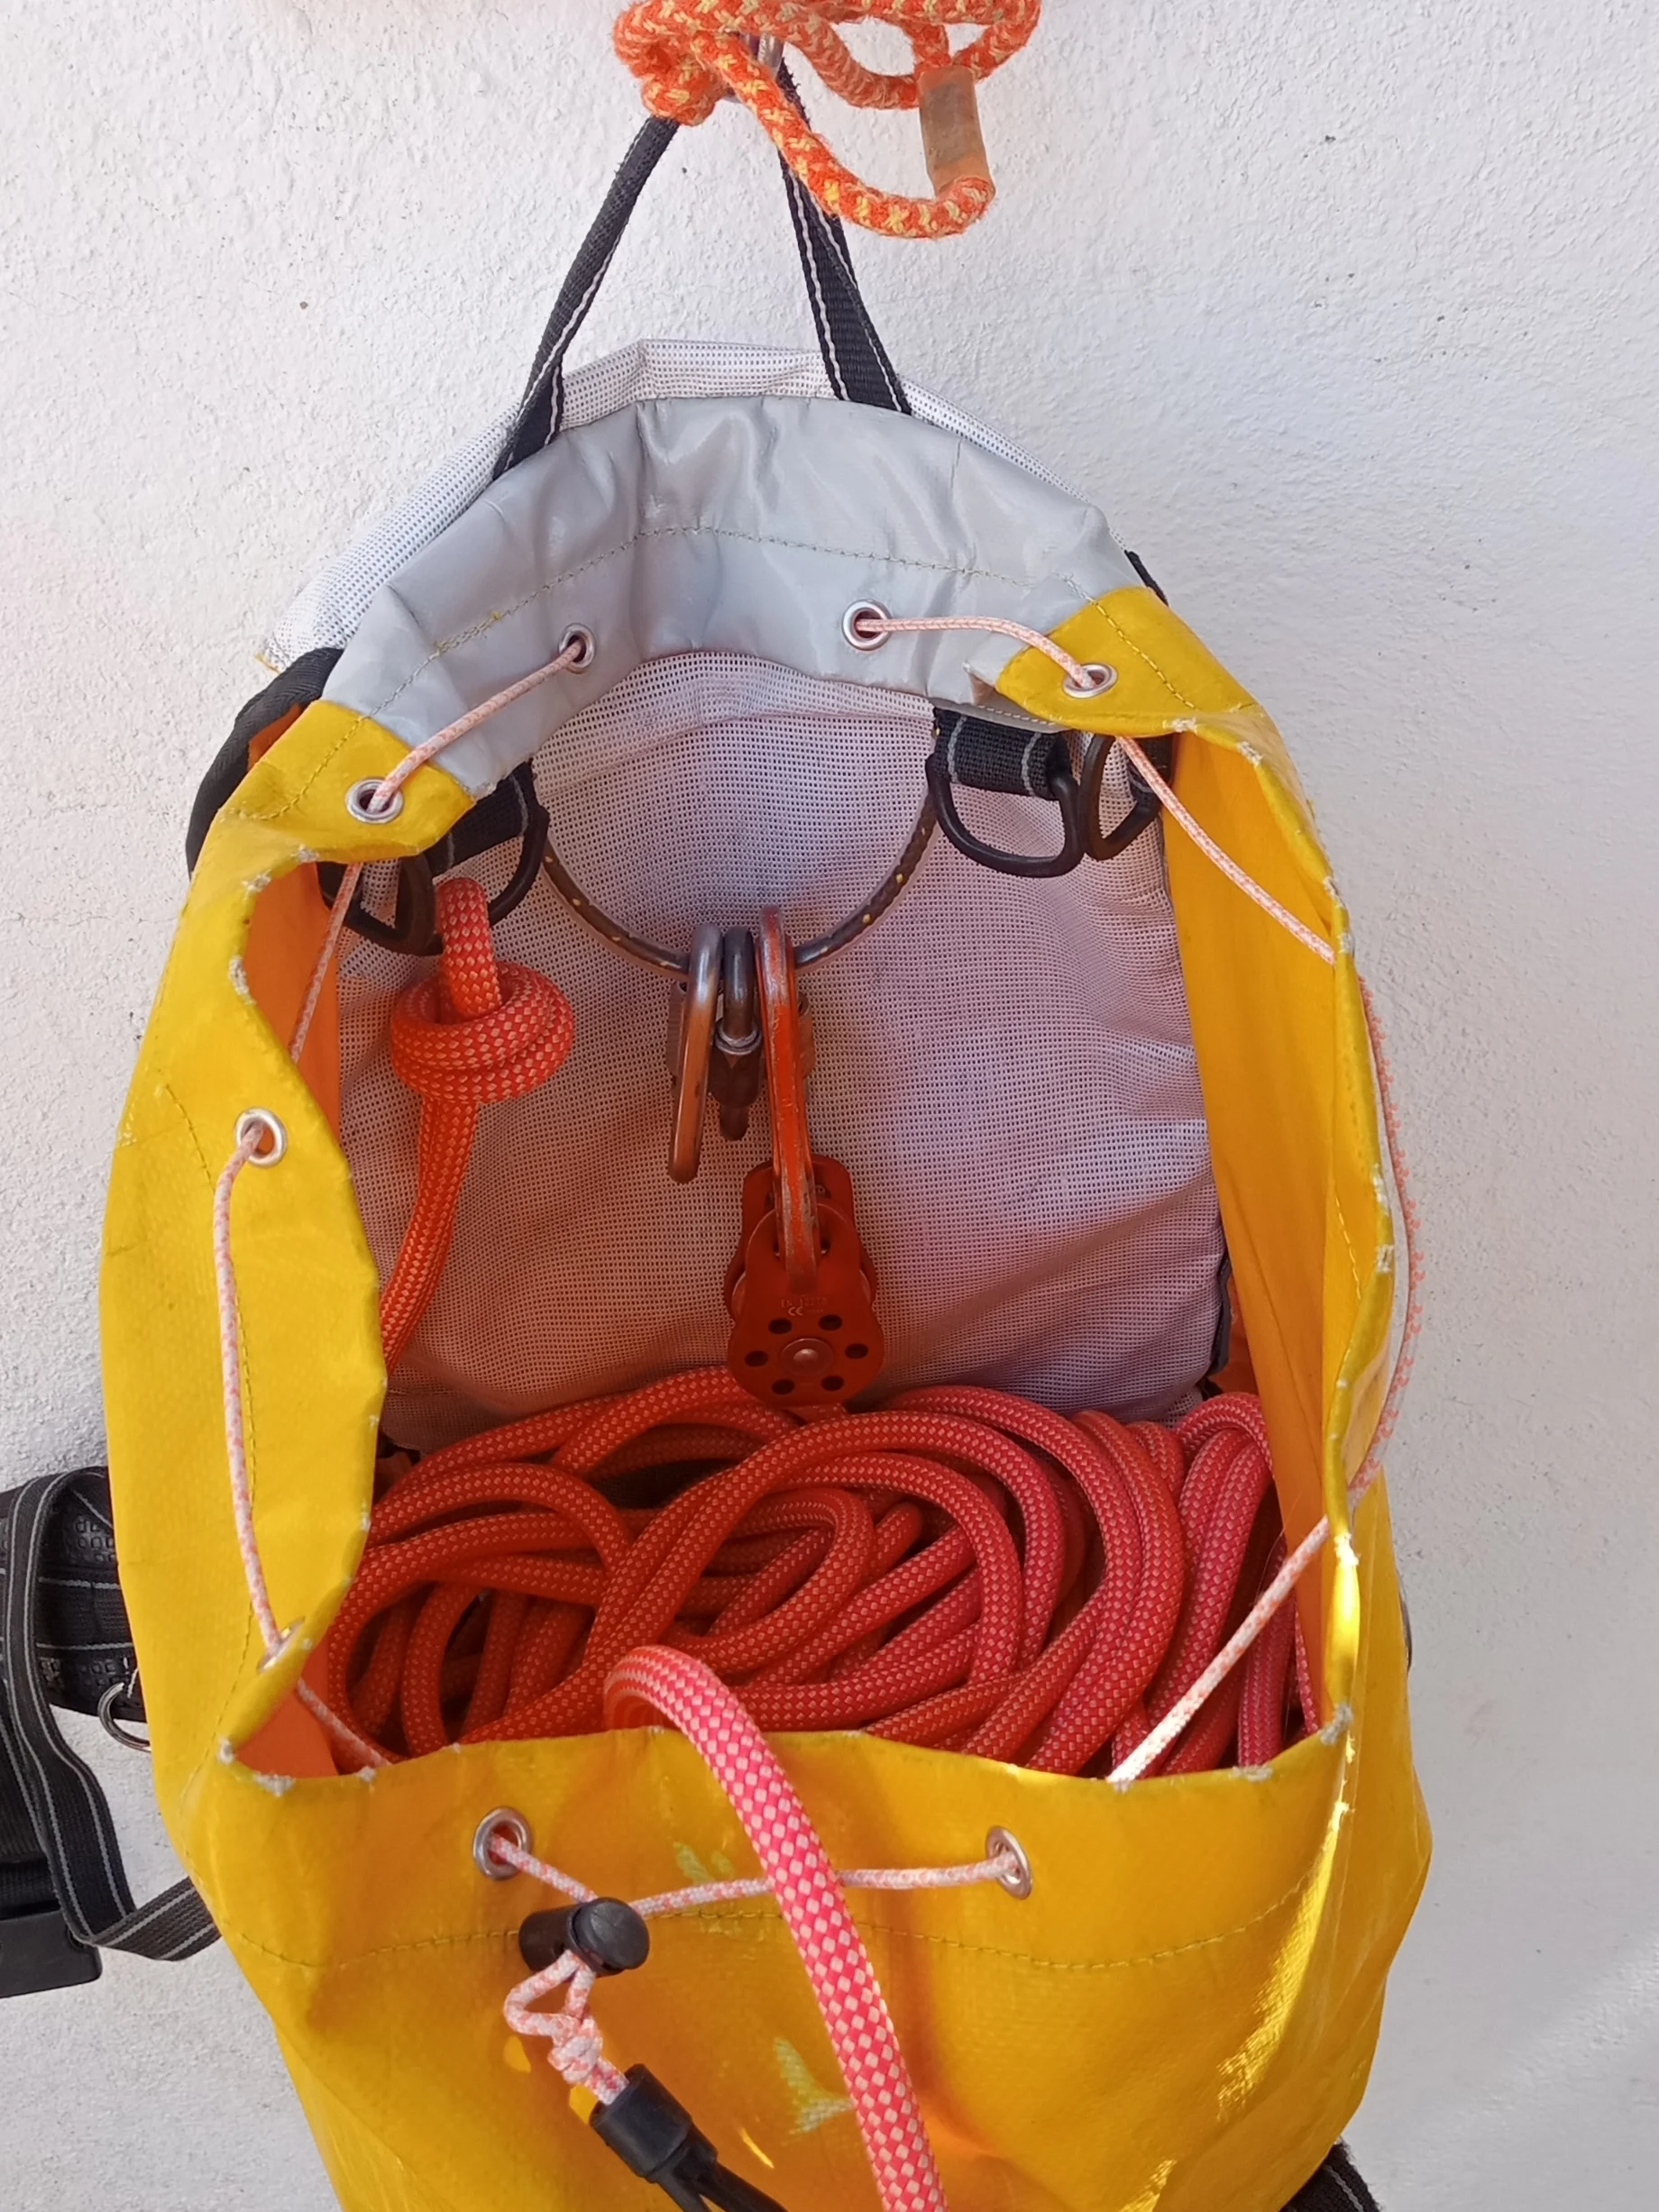
iNNER Haul Loop: Working Space
I girth hitch a presewn prusik to my bag’s inner haul loop and then use a small locking carabiner as my bags anchor attachment point.
Inside Your Bag: Gear Storage Rack
Function: Keeps your gear organized and easily accessible.
Challenge: Keeping everything out of your way.
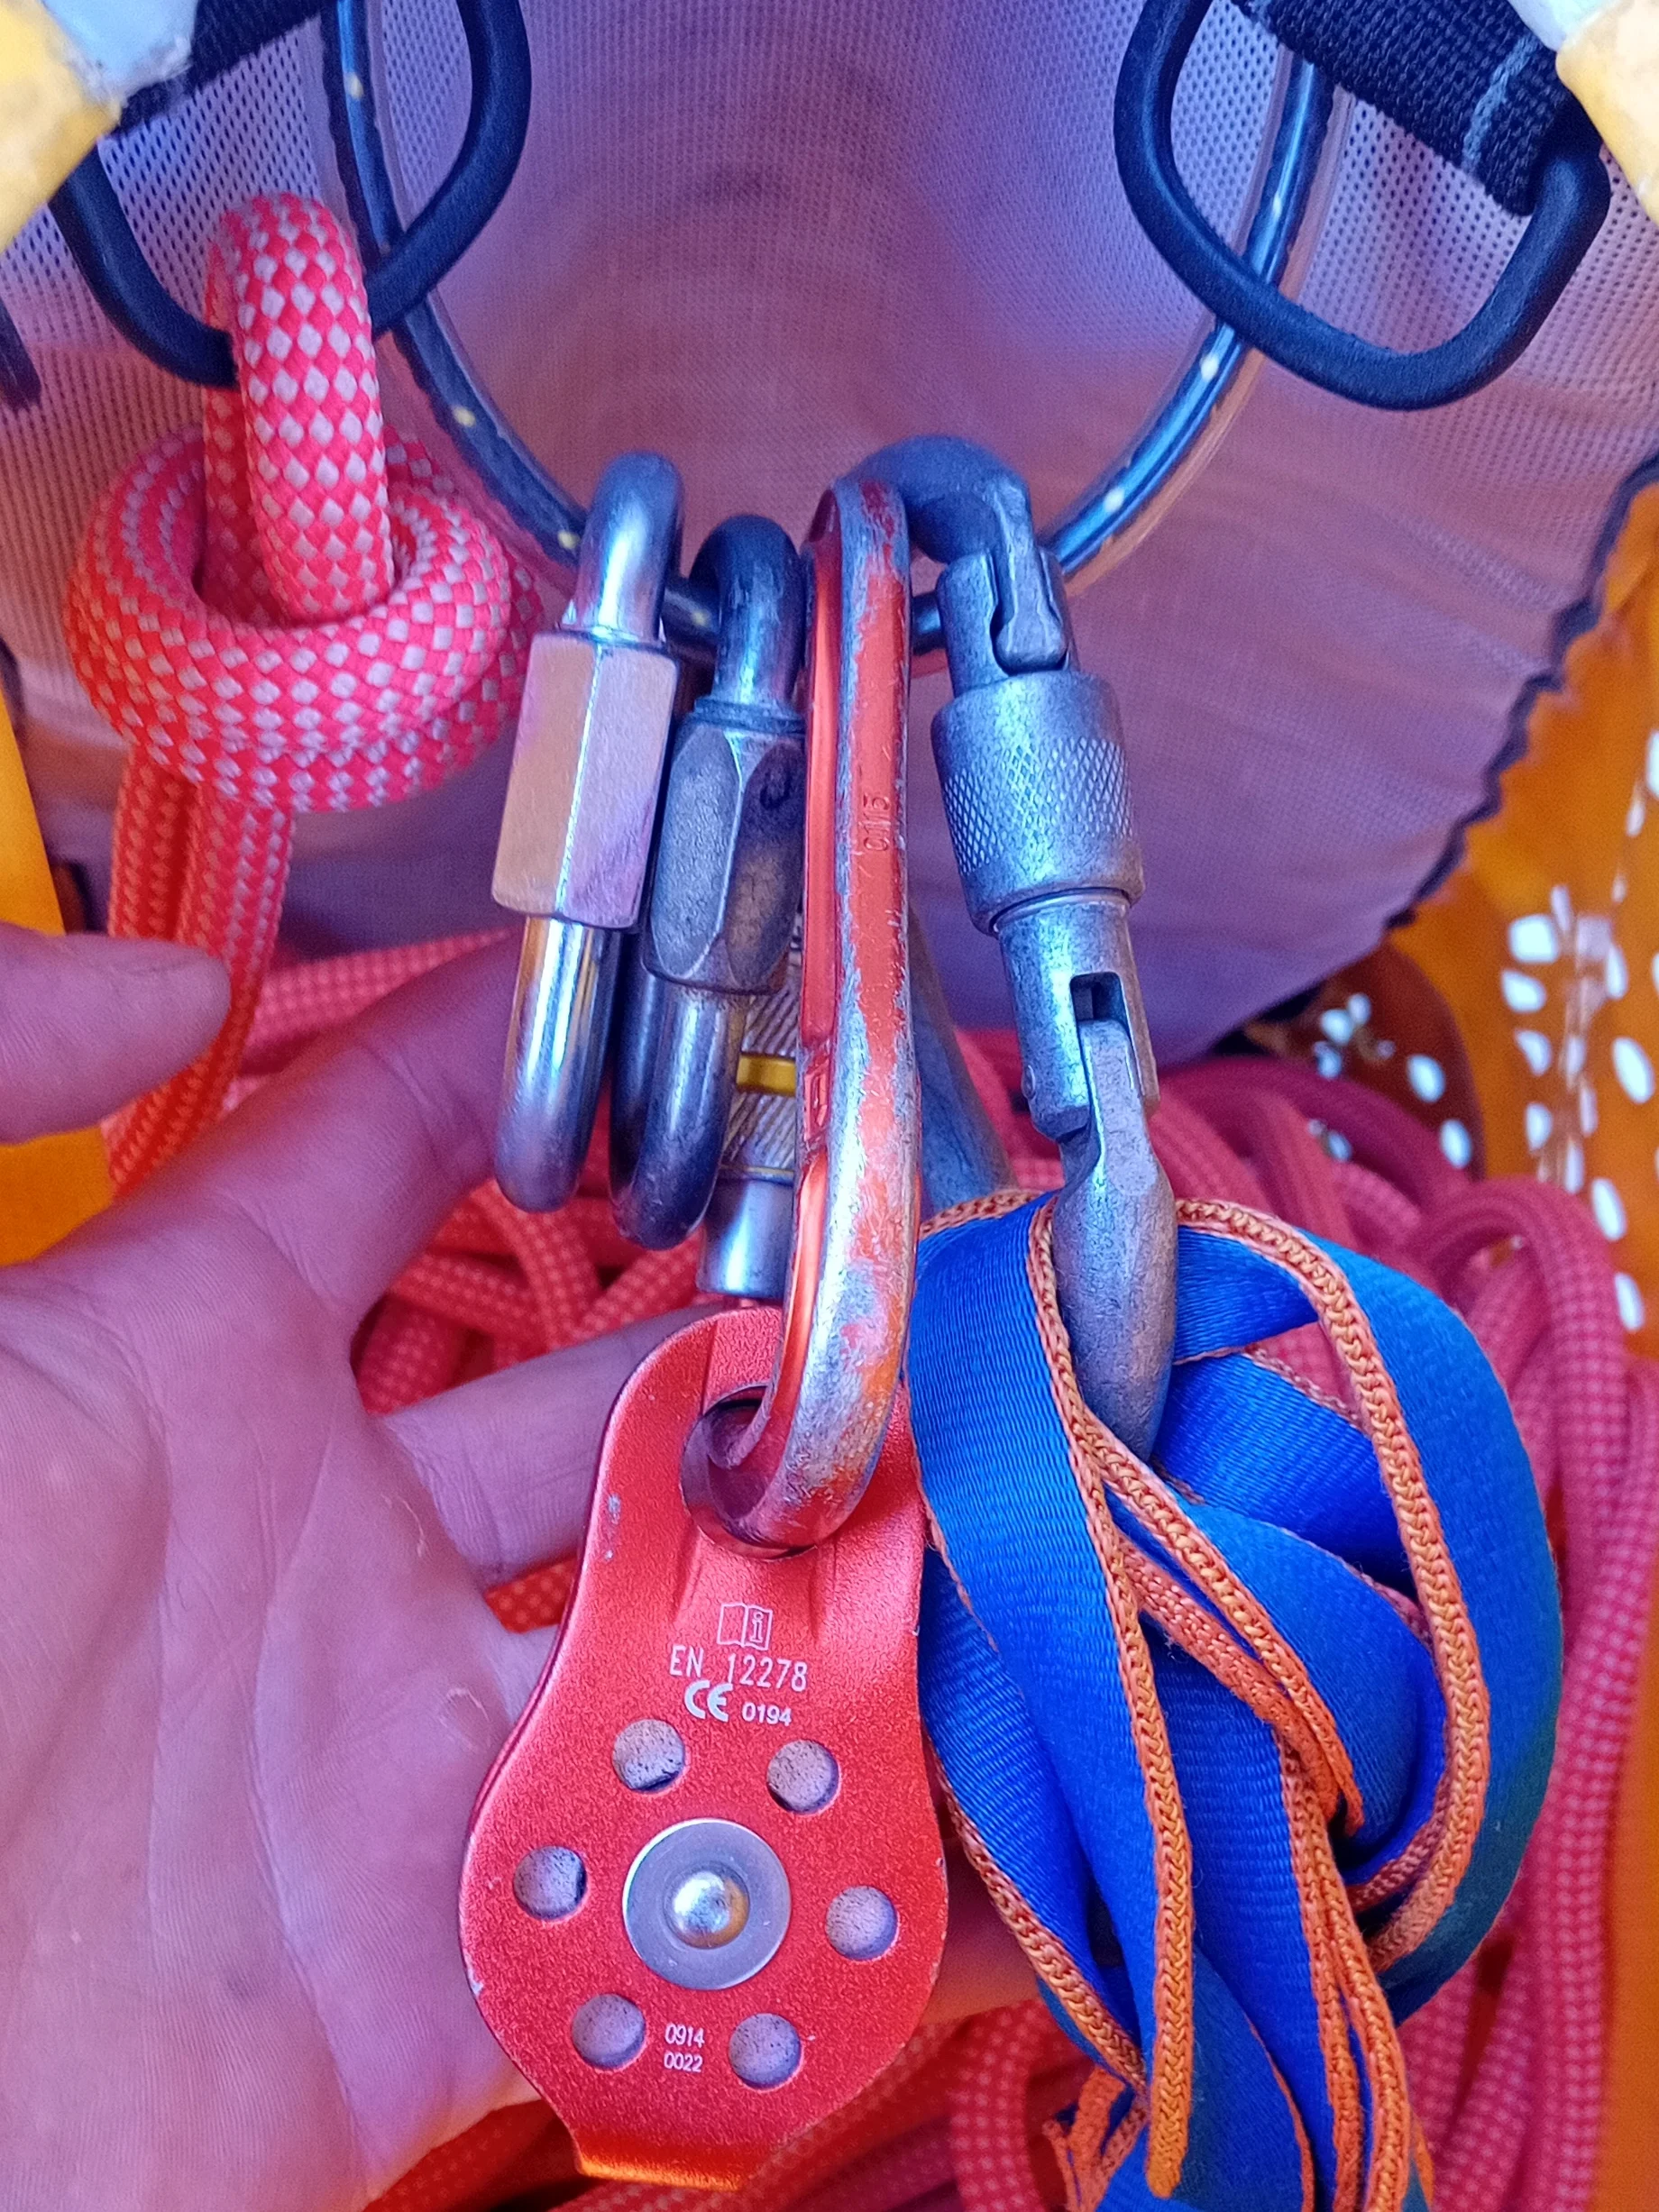
Gear Rack Storage: Store a 120cm sling and carabiner, a pulley, and 2x mallions. You can also store a VT Prussic or an extra descender (not pictured).
Inside Your Bag: Working Space
When you are using your canyoning bag as a rope bag you need to ensure that the inside of your bag is free from excess equipment that gets in your way. Keep things svelte and you will see increases in efficiency.
Hydration Station!
Tactics: The most common hydration strategy in Washington State canyons is to bring a water filter and share the bottle of filtered water amongst the whole group.
Recommended Filter: Katadyn BEfree water filter.

Pro-tip: A good strategy is to bring a small water bottle and mix a scoop of chia seeds and electrolytes into the water you filter. This way you get the salts and carbs you need to stay mentally sharp and energized.
Consider this: If you are operating out of your canyon bag (no rope bag) it is important to have your water bottles secured to your bag.
Caution: It is common for canyoneers to drink very little water in a canyon. However, this is not a good idea as dehydration affects your mental state and decision making abilities. You can get dehydrated in canyons…. Surrounded by water.
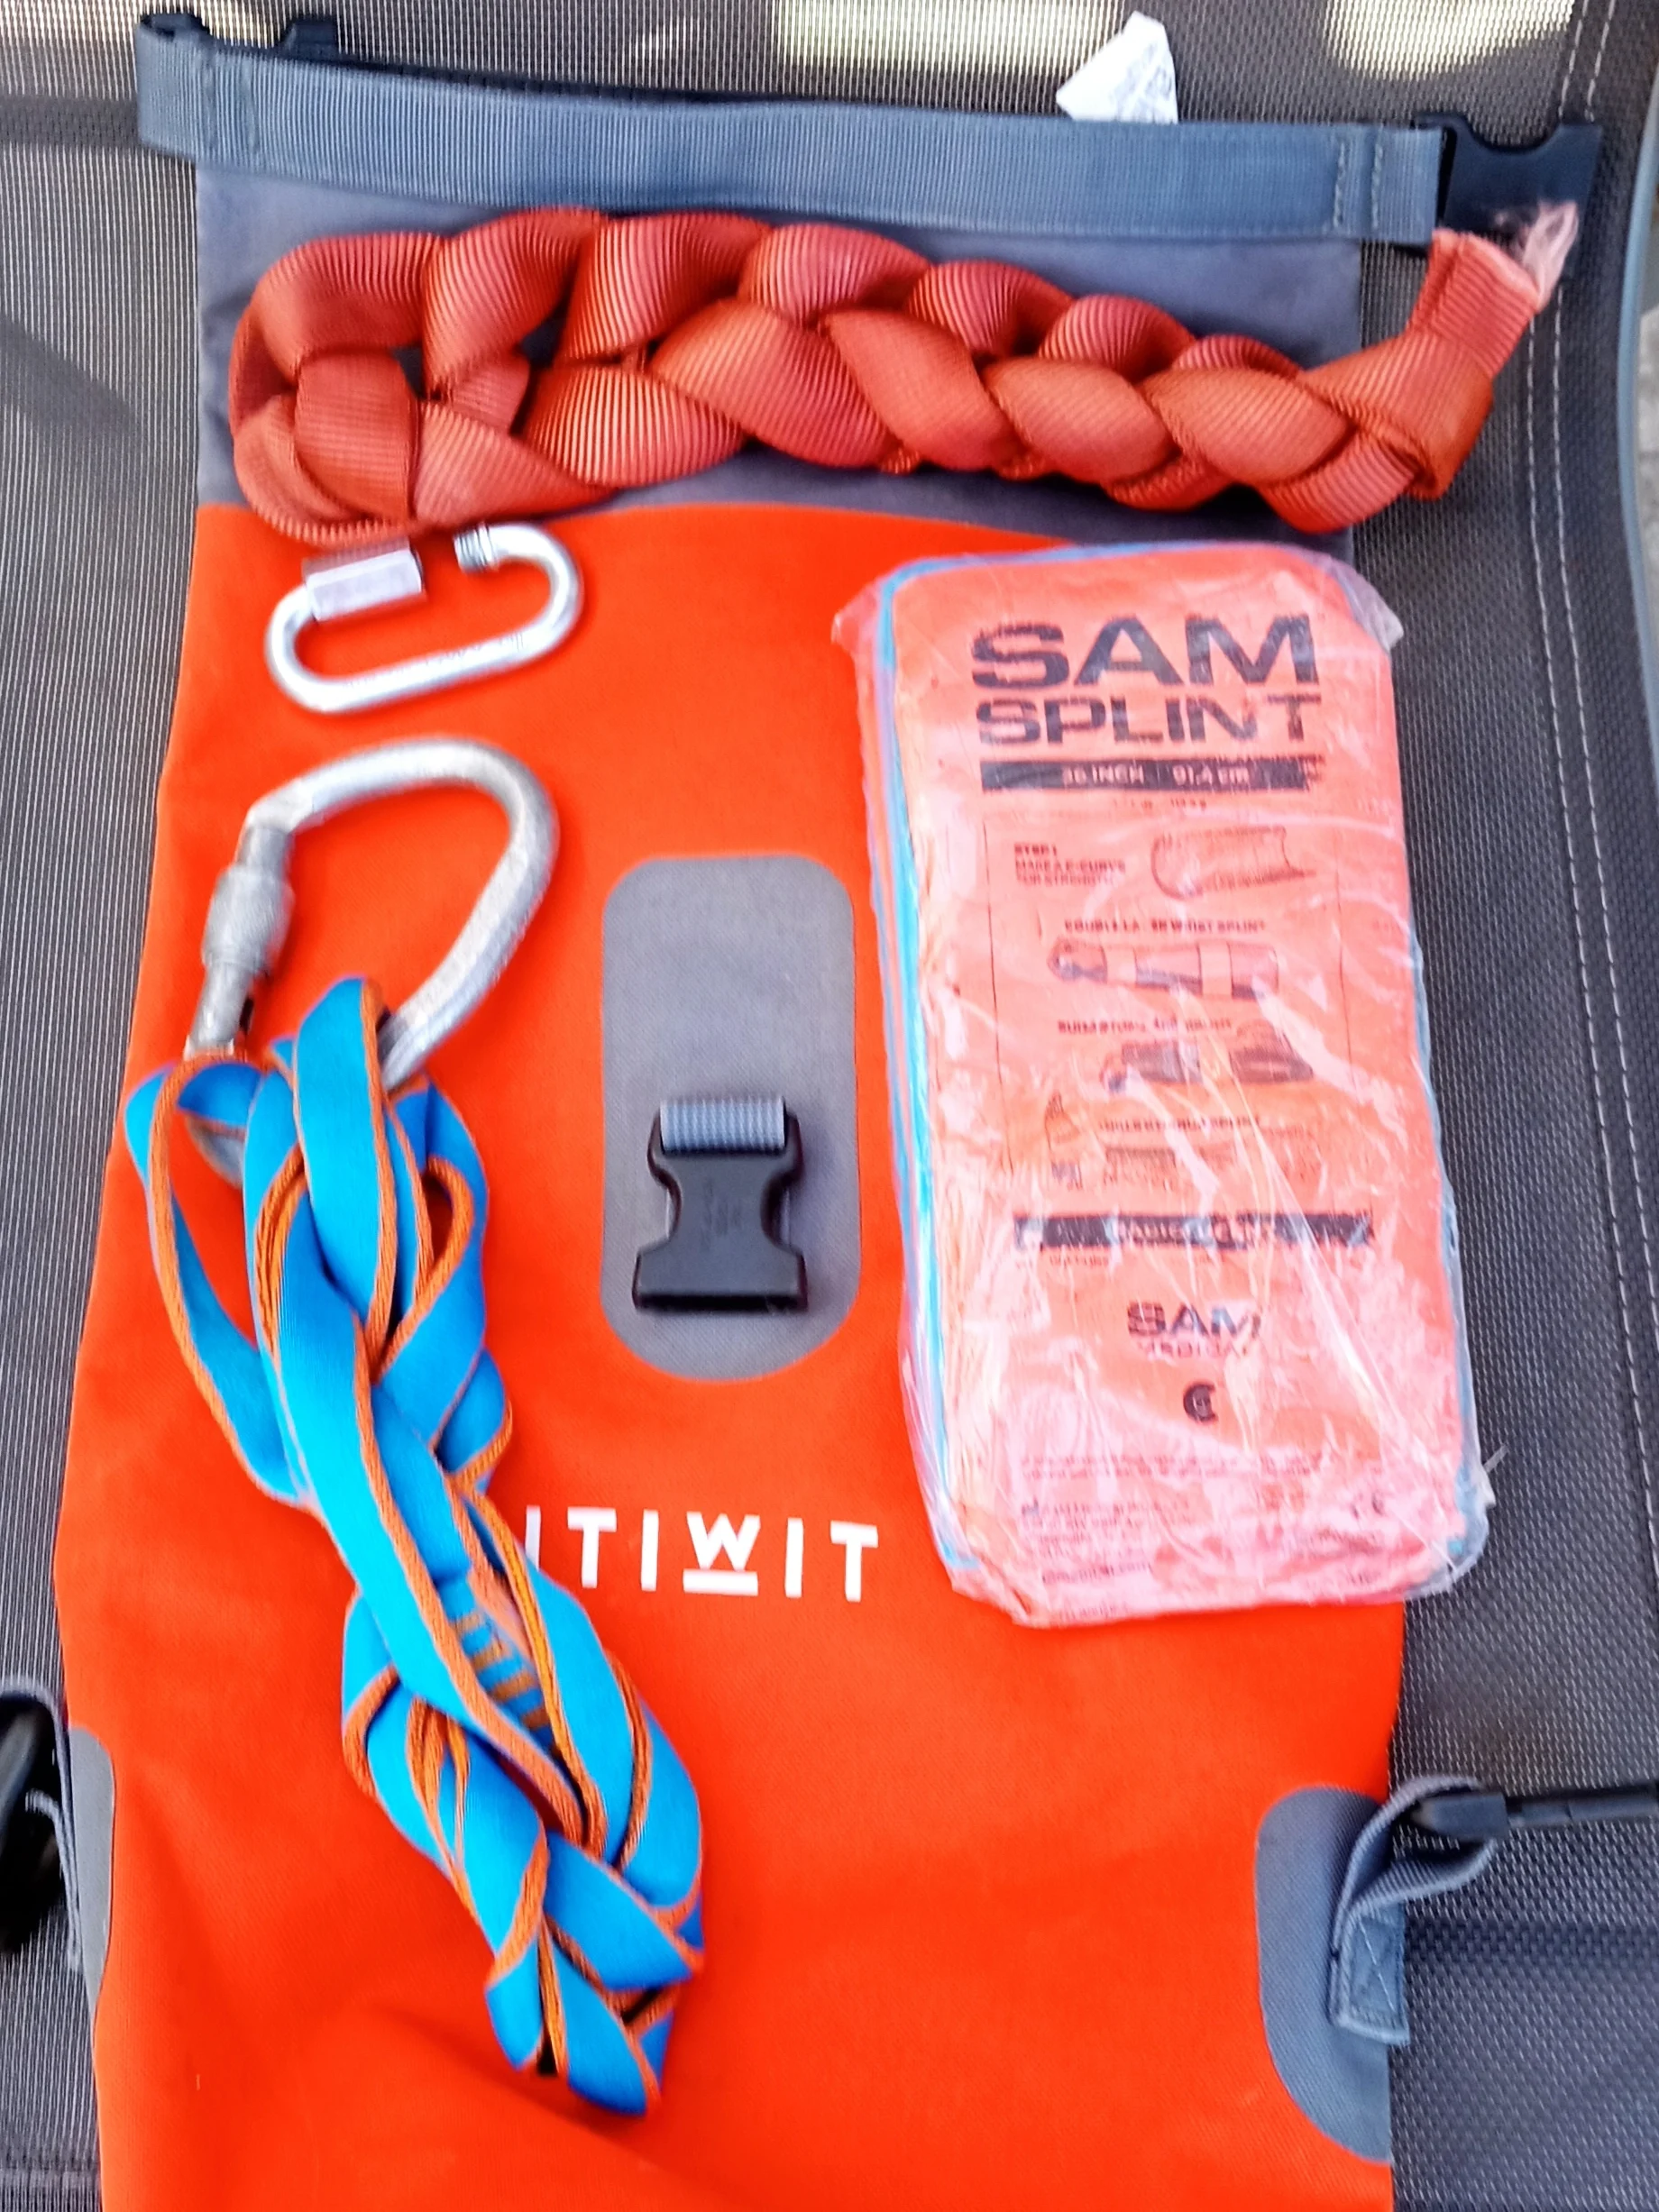
Canyon Dry Bucket
Your dry bucket is a very important storage space. This is where you keep things that you rarely use or only at designated stopping points (lunch time) during your canyon descent.
Consider This: Many SW Canyoneers are surprised when their canyon bag doesn’t float in a whitewater canyon. A dry bucket is important because it adds buoyancy to your backpack and helps keep it afloat!
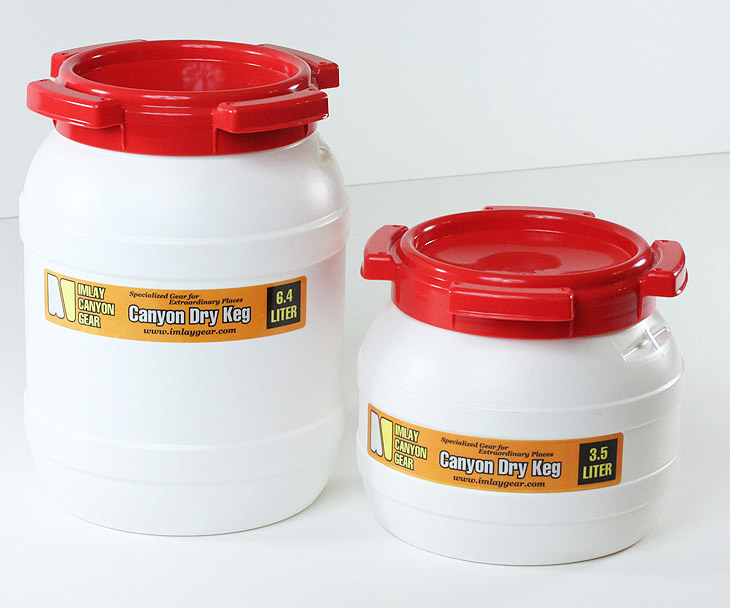
Guide Perspective: I like to keep my dry bucket at the bottom of my bag. I keep it sideways so that it fills up the bottom of my bag completely. Because I use my canyon pack as a rope bag I flake the rope on top of my dry bucket.
Pro-tip: Check that the lid of your drybucket is threaded correctly everytime that you close it. An improperly closed dry bucket becomes a very heavy wet bucket.
Pro-tip: Be careful throwing your bag off cliffs into pools or submerging it more than necessary. The pressure can break dry buckets.
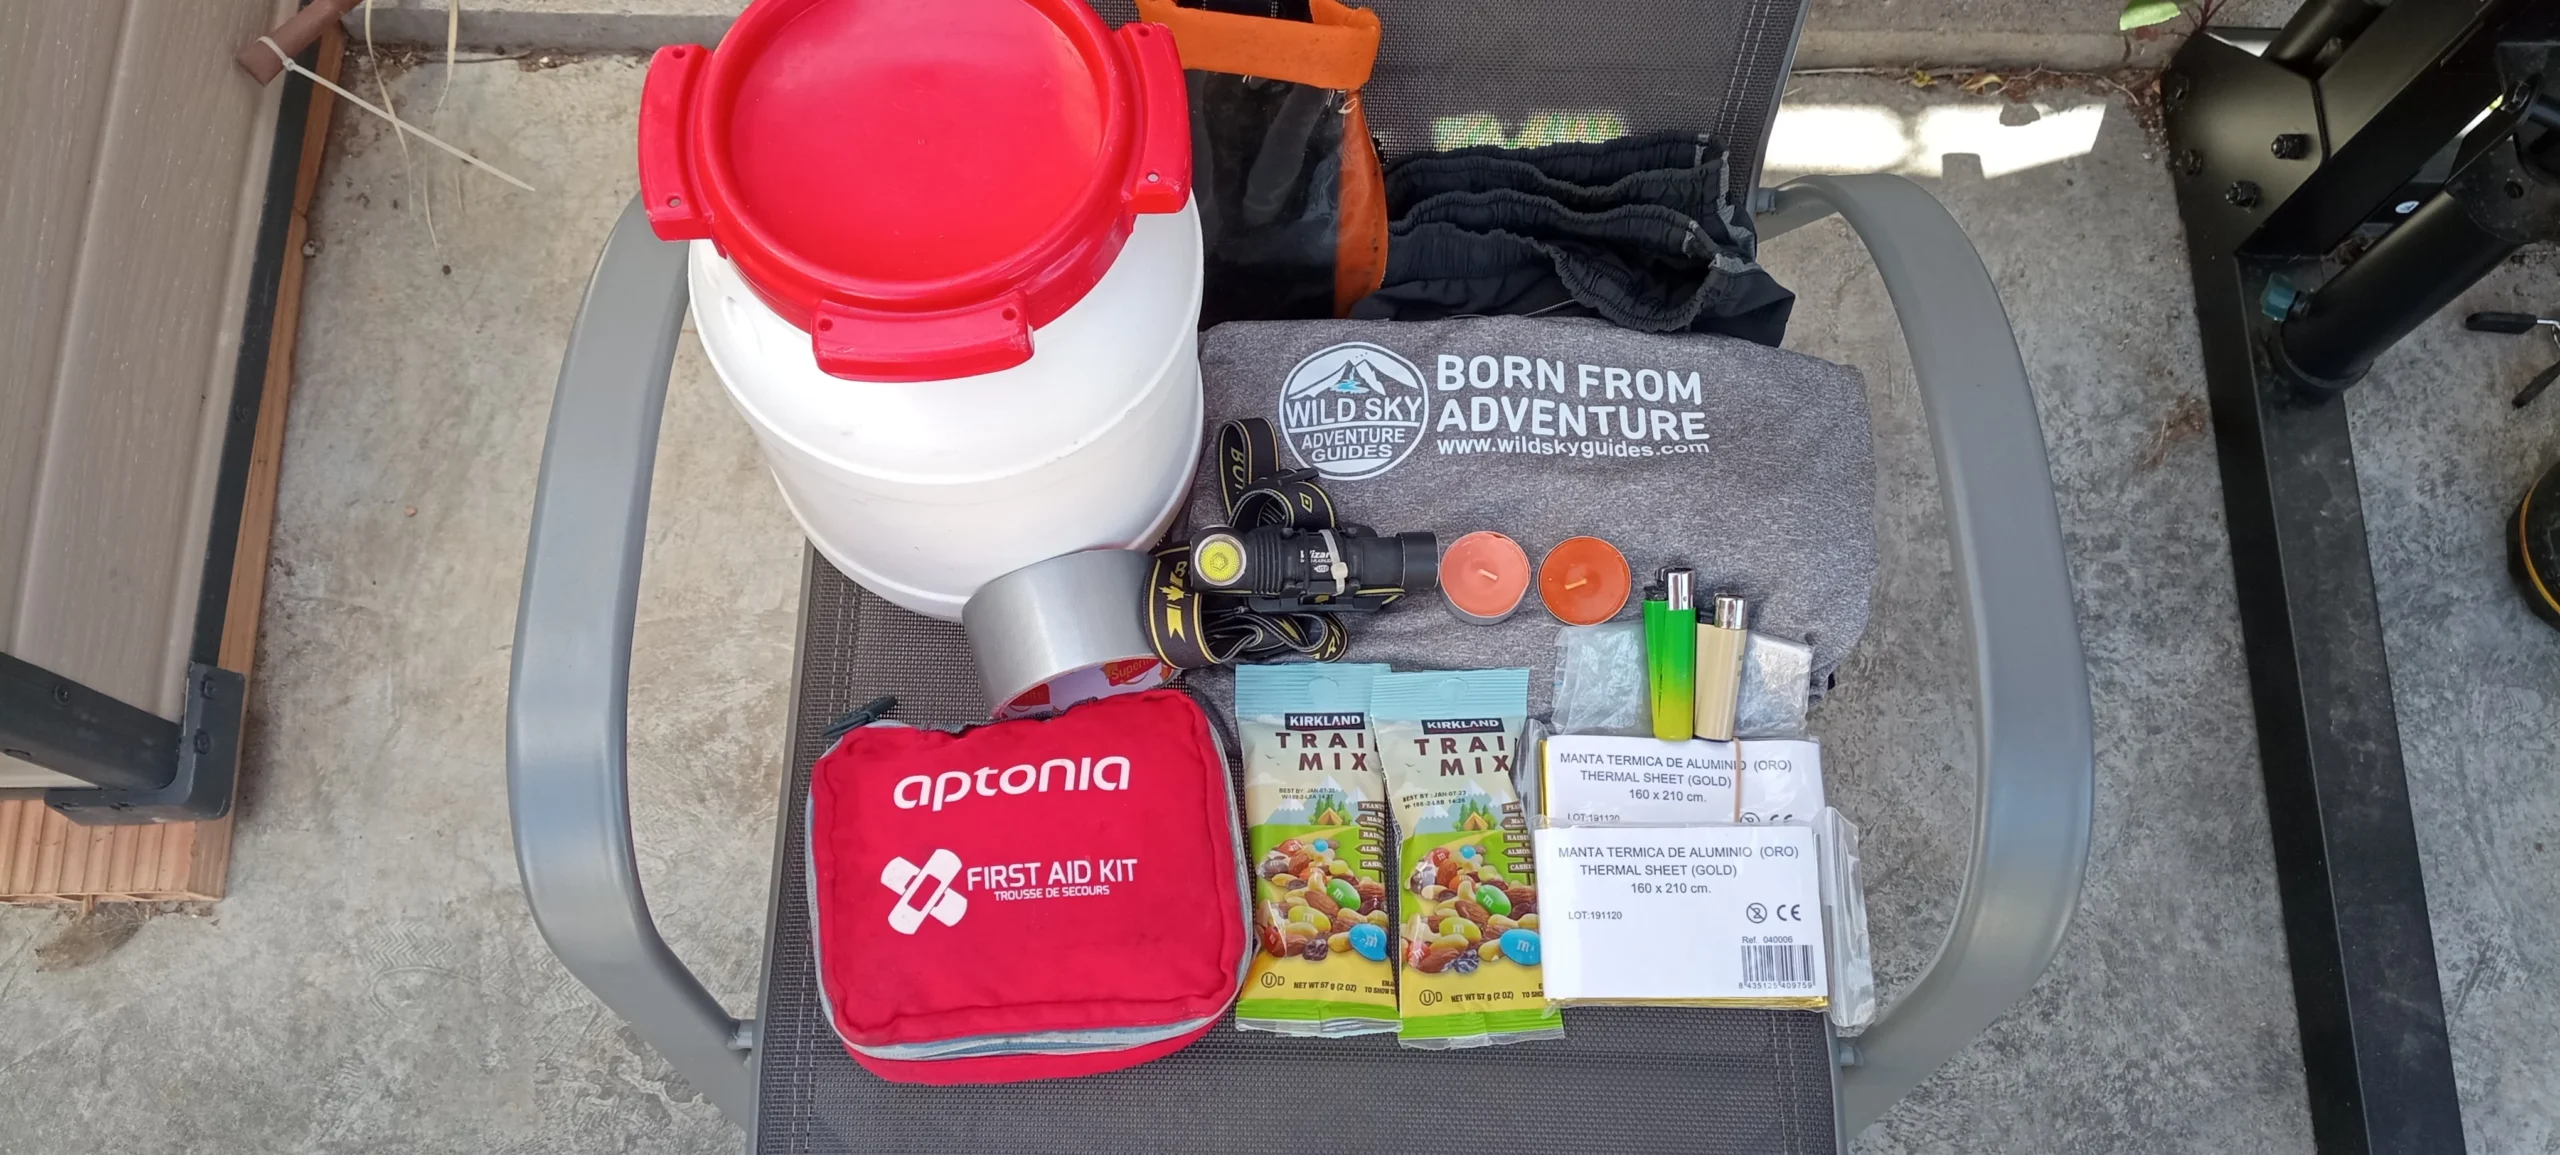
Dry Bucket Packing List:
Dry Clothes – Sometimes the exit of the canyon is long and hot and you want a light pair of dry clothes so that you aren’t hiking in neoprene.
Food for the day: Prioritize calorie dense foods like nuts, dried fruits, and chocolate.
Waterproof Headlamp: Sometimes it gets dark and you need to see!
Navigational Equipment: (GG )- For some this is a phone, for others a map and compass.
Satellite Transponder: An InReach or SPOT device. When you need it, you really need it!
Canyon Specific First Aid Kit: The contents of a quality canyoning First Aid KIt is beyond the scope of this article. Another reason to seek out institutional training.
Emergency Kit: 2 candles, 2 thermal blankets, 2 lighters, duct tape, and extra calories. Make sure your kit is double wrapped in additional zip-lock bags!
Accidents in canyons can lead to rapid hypothermia for the victim and rescuers alike. Always carry an emergency kit and you can build a tent style bivvy out of the thermal blankets, duct tape, and rope.
no kitchen sink?
It is important that your bag has all the necessary equipment and nothing more. The Canyon environment is an inhospitable environment. Our sport is about safely and efficiently moving through these environments. An overpacked bag is a hazard that can be avoided!
Conclusion:
Swiftwater acquatic canyons are very different from desert SW canyons. It can be humbling to move from a domain that you have mastered into one where you have to take on the role of Padawan learner. Being open to learning new techniques is an important part of visiting a new canyoning destination.That which works well in your home turf may not work well in a new location.
Safety: Wild Sky Adventure Guides strongly endorses professional instruction supplemented by a more experienced mentor.
In the PNW the most common training organizations are V7 Academy, the American Canyoneering Association, The Seattle Mountaineers, and The American Alpine Institute. Seek out instruction!
Be sure to visit the WA Canyon Coalition Safety Page for more information on best practices for your visit to the PNW.
Happy Canyons!
Pingback: Visitors Guide: Part 2: Necessary Equipment For Canyoneering In Washington State. Part 2 - Wild Sky Adventure Guides
Pingback: Visitors Guide: Part 3: Necessary Equipment For Canyoneering in Washington State. - Wild Sky Adventure Guides
Pingback: Visitors Guide: Part 1: Necessary Information For Canyoneering in Washington State. - Wild Sky Adventure Guides